
Best Mascara Tips for Longer-Looking Lashes
Longer-looking lashes can make your eyes appear more defined without requiring a complicated makeup routine. The result depends on how you prepare your lashes, position the brush, and build the product. With a few thoughtful adjustments, mascara can emphasize the length you already have while helping individual lashes look cleaner and more separated.
One common mistake is applying extra coats before checking whether the first layer is evenly distributed. Too much product can make lashes stick together, creating thickness that hides their individual shape. A controlled application usually gives you more opportunity to define the tips and create the appearance of length without weighing down the finished look.
The best mascara tips for longer-looking lashes work with your natural lash pattern and preferred makeup style. Straight lashes, fine lashes, and densely packed lashes may respond differently to the same brush. This guide explains how to prepare, apply, and refine mascara so you can create a flattering result with less trial and error.
Start With Clean Lashes and a Dry Lash Surface
Mascara is easier to apply evenly when your lashes are free from leftover makeup. Residue from the previous day can create uneven patches, making fresh product collect around areas that are already coated. Before beginning, check your lash roots and tips so you are working with a clean surface rather than building over yesterday’s application.
Let your lashes dry after washing your face or removing makeup. Water remaining on the hairs can interfere with how the formula spreads and sets, while excess oily skincare may contribute to smudging. Keep rich creams away from the lashes during preparation, and allow products applied around the eye area time to settle before starting.
Use this preparation stage to notice how your lashes naturally sit. Some may point downward, cross over neighboring hairs, or grow in slightly different directions. Understanding their pattern helps you decide where to place the brush and which sections need more attention, instead of applying the same amount of mascara across every part of the eye.
Choose a Formula That Suits Your Desired Finish
A lengthening mascara is generally intended to emphasize lash definition and the appearance of extended tips. A volumizing formula focuses more on fullness, although many mascaras combine both effects. Product descriptions provide a starting point, but the actual result also depends on the brush, amount applied, and how the formula behaves on your lashes.
For a separated look, consider whether the mascara allows you to build coverage without immediately creating a heavy coating. If your lashes are fine, a thick application may cause them to gather into larger sections. Begin with a modest amount and assess the result before deciding whether the formula needs an additional layer.
Water-resistant and waterproof formulas can be useful when you want more resistance to moisture, but removal requirements vary. Choose a mascara that fits your routine and that you can remove gently using a suitable cleanser. A product that looks impressive during application may become frustrating if taking it off requires repeated rubbing around the eyes.
Pay Attention to the Mascara Wand
The wand influences how easily you reach the roots, separate hairs, and coat smaller lashes. Slim brushes can offer more room to maneuver, particularly near the inner corners or along a tightly packed lash line. Larger brushes may deposit more product quickly, which can be useful for fullness but requires careful control when aiming for definition.
Closely spaced bristles or molded teeth may help distribute mascara and separate lashes, depending on their design. Curved brushes can make it easier to follow the lash line, although you may need to rotate the wand to reach different sections. Rather than choosing by shape alone, notice whether the brush gives you control during application.
Your hand position matters as much as the tool itself. Hold the wand where you can guide it comfortably without pressing the brush forcefully against the lashes. If a large brush repeatedly touches your eyelid, try adjusting the angle first, then consider whether a smaller design would make your usual mascara routine easier to manage.
Curl Bare Lashes Before Applying Mascara
Curling can make lashes appear more visible by lifting their tips away from the eye. This is particularly useful when naturally straight lashes point forward or downward, making their full length harder to see. Use a lash curler on clean, bare lashes so you can shape them before mascara creates a coating around the hairs.
Position the curler carefully and check that no eyelid skin is caught before applying gentle pressure. The tool should feel comfortable rather than pinch or pull, and its pad should be intact. Work patiently instead of squeezing forcefully, since the purpose is to create a smooth lift that supports the shape of your lashes.
Avoid using a standard mechanical curler over lashes that are already coated with mascara. Product can make lashes adhere to the tool, increasing the chance of pulling them during release. If curling feels awkward, practice the placement without clamping first and remember that mascara can still create an attractive, defined result without this extra step.
Remove Excess Product Before the First Coat
A wand carrying too much mascara can leave a thick deposit before you have time to separate the lashes. Check the brush after removing it from the tube, especially the tip where product may collect. If there is an obvious excess, gently wipe it on a clean tissue before bringing the wand near your eyes.
Avoid repeatedly pumping the wand in and out of the tube to gather more product. A gentle turn inside the container is usually enough to coat the brush for another pass. Closing the mascara properly after use also helps keep the formula in its intended condition, so application remains as consistent as possible over time.
The first coat should give you control over the overall shape. A smaller amount of product makes it easier to reach individual sections and see which lashes need additional coverage. You can always add a little more where necessary, while removing a heavy deposit from lashes that have already stuck together can be considerably harder.
Apply Mascara From the Roots Toward the Tips
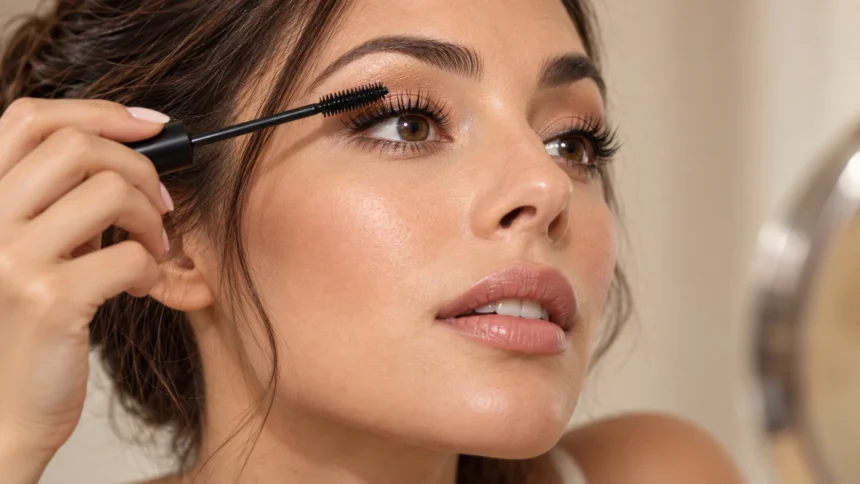
Start near the base of the upper lashes and draw the wand outward toward the ends. A small, controlled side-to-side movement at the roots can help distribute product before you sweep through the length. Keep the movement gentle so the brush coats the hairs without pressing against the eye or repeatedly touching the surrounding skin.
Continue the stroke through the tips instead of stopping halfway along the lashes. This helps create a more consistent finish and makes the ends easier to see, which contributes to a longer-looking result. Use lighter pressure as you reach the tips so they remain defined rather than collecting a thick bead of product.
Divide the upper lash line into manageable sections as you work. Coat the center, outer corner, and inner corner separately if that gives you better control than one broad sweep. This approach makes it easier to notice missed hairs and adjust the wand angle according to the direction each section naturally grows.
Direct the Lashes to Complement Your Eye Makeup
The direction in which you brush your lashes can change the overall appearance of your mascara. Lifting the central lashes upward can create a more open-looking effect, while guiding outer lashes slightly outward can emphasize a softer elongated shape. These are styling options you can adjust according to your preference and natural lash arrangement.
For a balanced finish, follow the general direction of the hairs instead of forcing every lash toward one corner. Excessive sideways brushing may cause neighboring lashes to overlap and create uneven clusters. Focus on gentle separation, allowing the center and outer sections to form a gradual shape rather than an abrupt change in direction.
Check the result with your eyes open and your face relaxed. A lash shape that seems dramatic while you are looking downward may appear quite different from your normal viewing angle. Stepping back from the mirror helps you assess whether both eyes look balanced and whether the direction complements the rest of your makeup.
Build Thin Coats Without Overloading the Lashes
One carefully applied coat may be enough for a natural daytime look. If you want more definition, add a second light layer after the first has begun to settle, following the formula’s instructions where available. Timing varies between mascaras, so notice whether another pass spreads smoothly or starts dragging through product that has already dried.
Concentrate the additional layer on areas that need more definition rather than automatically coating every lash again. The outer section or lightly covered tips may benefit from a small touch-up, while other areas already look complete. Selective application helps preserve separation and avoids adding unnecessary weight across the entire lash line.
Stop building when the lashes begin gathering into thick groups or the brush no longer moves through them easily. More product at this stage may make the finish appear shorter and heavier by hiding individual hairs. Longer-looking lashes usually depend on visible tips and a clean shape, so volume should support that goal rather than overwhelm it.
Give Small and Lower Lashes Separate Attention
The inner corners often contain shorter lashes that are easy to miss with a broad horizontal brush. Use the wand’s tip carefully to apply a small amount of product to these hairs, keeping the movement controlled. Defining them can make the lash line look more complete without requiring the same coverage used on the longer outer lashes.
Lower lashes usually need less mascara because they sit close to the skin beneath the eyes. Hold the wand in a comfortable position and use short, light touches instead of repeatedly sweeping through them. Remove excess product beforehand so the application adds definition without creating thick marks or drawing more attention downward than you intended.
Applying mascara to the lower lashes is optional, especially if you prefer a softer finish or experience frequent smudging there. You can focus entirely on the upper lashes and still create an expressive look. Let the overall balance of your makeup guide the choice rather than treating full coverage on every lash as a necessary step.
Separate Clumps and Clean Up Small Mistakes
If a few lashes stick together, a clean lash comb can help refine the shape while the mascara is still workable. Move gently through the hairs with your eye closed, keeping the tool away from the eye itself. Use a comb designed for lashes rather than a pin or another sharp object that could cause injury.
Work on the area that needs attention instead of repeatedly combing the entire lash line. Too much manipulation can disturb the coating and leave sections looking uneven, particularly as the formula dries. If the mascara has become stiff or flaky, removing it gently and starting again may give you a better result than continuing to force separation.
For a small mascara mark on the surrounding skin, let the spot dry before gently lifting it away with a clean cotton swab. Take care not to rub product toward the eye or disturb nearby makeup unnecessarily. If mascara gets into your eye, pause the application and rinse it out rather than trying to finish the look first.
Prevent Smudging and Remove Mascara Gently
Smudging can result from several factors, including excess product, moisture, and contact between lashes and surrounding skin. Allow the mascara time to set before touching the eye area or applying additional products nearby. If marks appear repeatedly in the same place, review your application and skincare placement before assuming you need a heavier or more resistant formula.
Handle mascara with clean hands, avoid sharing it, and follow its labeled replacement guidance. Do not add water, saliva, or other liquids to revive a drying tube, as this can affect the product’s hygiene and performance. If its smell or texture changes noticeably, or it causes irritation, discontinue use instead of trying to work around the problem.
At the end of the day, use a remover suited to the mascara and follow the product directions. Give the cleanser time to loosen the coating before wiping gently, rather than pulling at resistant lashes. Thorough, comfortable removal completes the routine and prepares your lashes for a fresh application the next time you choose to wear makeup.
Conclusion
The best mascara tips for longer-looking lashes begin with preparation and controlled application. Clean, dry lashes, a manageable amount of product, and a brush you can position comfortably all contribute to a more defined finish. Curling bare lashes can add lift, while sweeping mascara through the tips helps make their existing length more visible.
Build the look gradually and pay attention to how your lashes respond. A thin second coat, careful work on smaller hairs, or a little separation may provide the finishing touch you need. If adding more mascara starts creating heavy clusters, pause and focus on refining the shape rather than continuing to increase the amount of product.
A successful mascara routine should suit your preferences and remain comfortable from application through removal. Experiment with brush angles, lash direction, and light layers to discover what works for your eye area. Consistent technique can make a simple product more useful, helping you create longer-looking lashes without making the process unnecessarily complicated.
FAQs
How Can I Make My Lashes Look Longer With Mascara?
Curl clean, bare lashes if desired, then sweep mascara from the roots through the tips.
Apply thin layers and keep the hairs separated so their individual shape and existing length remain visible.
Should I Curl My Lashes Before or After Mascara?
Use a standard mechanical lash curler before applying mascara, while your lashes are clean and bare.
Curling coated lashes can make them stick to the tool and increase the chance of pulling during release.
How Many Coats of Mascara Should I Apply?
Start with one light coat and add another only if you want more definition.
Stop when lashes begin clumping or the brush drags, since additional product may create a heavy, uneven finish.
Why Does My Mascara Make My Lashes Clump?
Clumping can happen when the wand carries too much product or you repeatedly coat lashes that are already drying.
Remove excess mascara before application and build coverage gradually to maintain better separation.
Does Mascara Actually Make Lashes Grow Longer?
Ordinary mascara creates a temporary cosmetic effect by coating and defining lashes; it does not make them grow longer.
Lift, visible tips, and careful separation can make your existing lashes appear more prominent.