
How to Do Winged Eyeliner Easily With a Simple Method
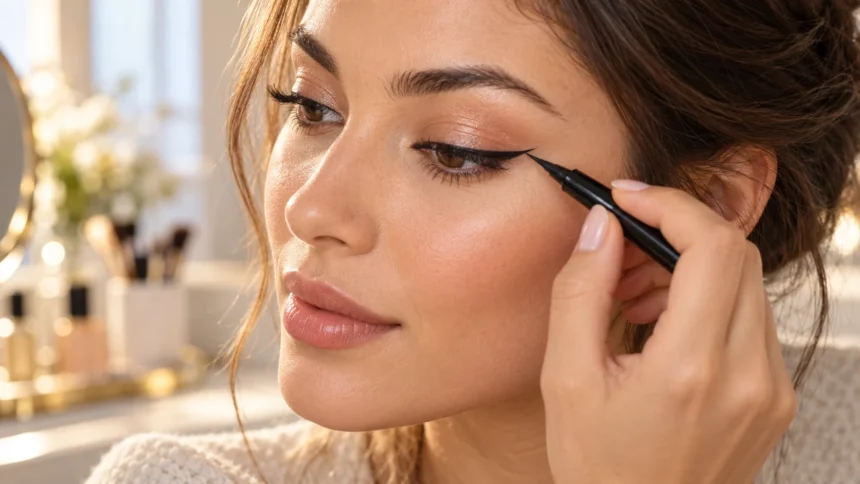
Learning how to do winged eyeliner easily starts with breaking the shape into small, manageable sections. Draw a short guide at the outer corner, connect it to your upper lash line, and fill the space gradually. This approach gives you more control than attempting one long stroke and makes uneven sections easier to correct.
A wing is an extension of eyeliner beyond the outer corner of the eye, usually pointing outward and slightly upward. Its length, thickness, and angle can change the overall effect of your makeup. A small flick creates subtle definition, while a longer, fuller wing produces a more noticeable cat-eye look that may require extra practice.
Your eyelids do not need to match a particular shape for winged eyeliner to work. The important detail is placing the wing so it looks balanced when your eyes are open and your face is relaxed. This guide explains the technique, suitable products, corrections, and practical adjustments that can make your routine easier to repeat.
Choose an Eyeliner That Gives You Comfortable Control
A felt-tip liquid eyeliner can be a useful starting point if you prefer a firm applicator that feels similar to a pen. It allows small marks and precise edges when the tip is in good condition. Check that the product flows evenly, because a dry tip can skip across the skin and make a simple line frustrating.
Brush-tip liquid eyeliner creates a sharp finish but responds more noticeably to pressure and movement. A light touch produces a finer line, while pressing harder generally increases its width. If you choose this type, practice a few strokes on the back of your hand first to understand how much the tip bends as you move it.
Pencil eyeliner offers a softer alternative that can be easier to adjust or blend during practice. Gel applied with a small angled brush also lets you build the shape in controlled sections. Choose one comfortable formula for your first attempts rather than switching products repeatedly, since learning its texture and setting time helps you improve more consistently.
Gather Your Tools Before Starting
You only need a few basic items to practice winged eyeliner without interrupting the process. Prepare your chosen liner, a mirror, a clean cotton swab, and a makeup remover suitable for the eye area. If you use gel, add a clean angled brush with a narrow edge that can place product precisely near the lashes.
A small detail brush can help refine the outer edge or replace makeup disturbed during cleanup. Keep a little concealer nearby if you already use it, but do not rely on thick coverage to hide an oversized mistake. Removing the misplaced section usually gives you a cleaner starting point than repeatedly adding more layers around it.
Make sure everything is within reach before you begin, especially when liquid eyeliner sets quickly. Keep applicators clean and avoid sharing eye makeup or using a product that has changed noticeably in smell or texture. Working with dependable tools removes unnecessary distractions and helps you identify whether an uneven result comes from technique or the product itself.
Prepare Your Eyelids for Smooth Application
Start with clean hands and eyelids that are free from leftover makeup and obvious surface oil. If you apply moisturizer around the eyes, let it settle before adding liner so the skin is not slippery. An unstable surface can make the line move or spread, even when you place it carefully with a steady hand.
Apply eyeshadow before eyeliner if you are using both, because powder can cover or dull the finished wing. Keep the layers underneath light and smooth rather than building a thick base near the lashes. A small amount of eye primer may help your routine, but follow its directions and avoid assuming that more product will improve wear.
Check that your liner tip is clean and ready, then test the flow before moving close to your eye. A product that drags or deposits unevenly may need replacement rather than stronger pressure. Keep makeup on the eyelid skin, and stop if application feels uncomfortable instead of repeatedly pulling or rubbing the area to make the formula work.
Position Your Mirror and Keep Your Face Relaxed
Use even lighting and place your mirror where you can look forward comfortably without raising your chin or twisting your neck. For drawing along the upper lashes, looking slightly downward can reveal more of the lid. Return to a straight-ahead view when judging the wing, because that shows how the shape appears in your normal expression.
Rest your elbow on a table if it helps steady your hand, and hold the applicator without gripping it tightly. You may rest part of your hand lightly against your cheek while keeping pressure away from the eyeball. Small, relaxed movements are usually easier to control than trying to hold your whole arm rigidly in the air.
Avoid lifting your eyebrows or pulling the outer corner firmly sideways while planning the wing. These movements change the skin’s position, so the outline can look different when you relax your face. If a fold blocks your view, adjust the mirror or your head angle, then check the placement again with your eyes open naturally.
Step 1: Decide Where Your Wing Will End
Look straight into the mirror and identify the outer corner of your eye before making the first mark. Imagine a short extension traveling outward and slightly upward in a direction you find flattering. The lower lash line can offer a rough starting guide, but you can adjust the angle to suit your eyelids and preferred effect.
Place a tiny dot or short mark where you want the tip of the wing to end. Keep it close to the outer corner during your first attempts, since a short wing is easier to connect and balance. You can extend it later, but removing a long, misplaced flick often disturbs more of your surrounding makeup.
Mark the endpoint on the other eye before building either wing into a bold shape. Compare how the two marks look while facing forward, without trying to match their distance from every facial feature exactly. Natural differences between eyes may require slightly different placement to create a similar visible effect when both eyes are open.
Step 2: Draw a Short Outer Guide
Connect the outer corner area to your chosen endpoint with a fine line, using one small stroke or several connected marks. Keep the product on the skin and avoid dragging the applicator toward the eye itself. The guide should be delicate enough to adjust without forcing the entire wing into a thick or sharply outlined shape immediately.
If your hand hesitates, pause and check the direction instead of repeatedly tracing over the same section. A small gap is easier to fill than a wide line that has spread beyond your intended outline. With pencil or gel, place light strokes along the guide; with liquid, use minimal pressure so the tip stays narrow.
Repeat this step on the second eye and compare both guides before moving on to filling. Look at their general direction and visible length rather than concentrating only on what they look like with your lids lowered. Make a small correction now if necessary, because the initial guide determines much of the finished wing’s position and overall balance.
Step 3: Connect the Wing to the Upper Lash Line
From the wing’s endpoint, draw a second fine line inward toward the outer section of your upper lash line. This creates a small triangular outline that joins the flick to the eye. Keep the connection short and narrow at first, because a larger triangle can quickly make the liner much bolder than you intended.
Connect the outline to the lash line without forcing the same angle across every eyelid. A fold may require you to adjust the path so the visible connection looks smooth when your eye is open. Check the result from the front, then lower your gaze briefly if you need to see and fill a small hidden section.
Gently fill the space between the two guide lines, using small amounts of product rather than a heavy layer. Focus on creating a continuous shape without leaving bare gaps near the outer lashes. If the wing already provides enough definition, keep the rest of the upper line minimal instead of automatically making the whole eyelid equally dark and thick.
Step 4: Complete the Upper Lash Line
Start around the middle of your upper lashes and draw short strokes toward the outer wing, keeping the line close to the lash roots. Join the sections gradually instead of trying to cover the full lid in one movement. This helps you maintain a thin inner edge while creating a smooth connection with the fuller outer section.
Move inward from the middle only as far as you want the definition to extend. A delicate line that stops before the innermost corner can still look complete, especially for an everyday style. Avoid pushing product into the watery inner corner, where placement is harder to control and excess liner may move away from the intended shape.
Check both eyes open and make only the additions needed to create a consistent visual effect. If one upper line looks slightly thicker, consider reducing it rather than enlarging the other side automatically. Keeping the application controlled preserves the look you planned and prevents a small adjustment from turning into an unexpectedly heavy band of eyeliner.
Adapt Your Wing for Hooded or Uneven Eyelids
Hooded eyelids have a fold that covers part of the movable lid, which can hide or interrupt a wing drawn with the eye closed. Plan the outer shape while looking forward so you can see where it remains visible. A thin upper lash line also leaves more visible lid space than a wide application that fills the area beneath the fold.
Some eyelids need a small angle or step in the outline where the wing crosses the crease. That shape may look less smooth when the eye is closed but appear continuous in your normal open-eye position. Fill the relevant sections carefully, judging the result mainly by how it looks when your face and brows are relaxed.
If this feels too complicated, try a short outer flick that does not cross much of the fold. Soft pencil can also provide a forgiving alternative to a sharply defined liquid wing. For uneven eyelids, adjust each side separately and aim for overall balance rather than assuming identical outlines will produce identical results on different surfaces.
Fix Uneven Wings Without Making Them Bigger
Uneven wings do not always require a complete restart, especially when the initial shape is small and lightly applied. Identify whether the problem is the angle, length, thickness, or connection before changing anything. A clear diagnosis helps you correct the specific section instead of adding product everywhere and creating two increasingly large wings.
Use a clean cotton swab lightly dampened with an appropriate eye makeup remover to lift a misplaced edge. Follow the remover’s directions and keep the amount controlled so it does not run toward your eye. Let the area dry before drawing again, because leftover moisture or oily residue can cause the replacement line to spread or skip.
A small brush with a little concealer can refine an outer edge once the liner has set, provided it suits your existing makeup. Use a thin application and blend it into the surrounding skin rather than leaving a pale stripe. If repeated correction irritates the area, remove the makeup gently and return to practice another time.
Help Your Wing Stay Defined Throughout the Day
The way eyeliner wears depends on the formula, eyelid preparation, moisture, and contact with skin folds or lashes. Give liquid or gel time to set according to its directions before touching the line or applying another product over it. Keep the layer reasonably thin, since piling on liner does not automatically improve how well it stays in place.
If you curl your lashes, do it before eyeliner when the curler tends to disturb your finished line. Apply mascara after the liner has set, moving carefully so the wand does not leave marks near the wing. Check the source of any transfer, because a mascara smudge may look like an eyeliner problem but require a different solution.
When liner repeatedly transfers into a fold, try a thinner placement or a different formula during a separate practice session. Long-wearing products may help, although they still need suitable preparation and careful removal. Avoid touching or rubbing the finished shape, and keep a small correction tool available when you expect to wear your makeup for an extended period.
Practice a Small Wing Before Trying Dramatic Styles
Practice winged eyeliner when you have enough time to pause, correct, and compare results without pressure. Begin with the same short shape for several attempts so you can learn your product’s flow and your eyelids’ behavior. A consistent starting point makes it easier to notice whether an adjustment actually improves the application or simply changes the style.
Once the small wing feels manageable, experiment with one feature at a time, such as length or thickness. Changing the angle, product, and outline together can make it difficult to understand why one attempt worked better than another. Take a quick photograph with your eyes open if it helps you assess the overall balance more clearly.
Expect small differences between applications, even after you become comfortable with the technique. Your goal can be a wearable result that feels easy to create rather than perfectly identical lines every day. Remove makeup gently after practice, and keep the routine comfortable so learning the skill remains enjoyable rather than a repeated cycle of forceful corrections.
Conclusion
Learning how to do winged eyeliner easily comes down to creating a small outline and building it in controlled stages. Choose a comfortable product, prepare your eyelids, and place short guides while checking your eyes in a relaxed position. Connecting the wing to the upper lashes gradually gives you more flexibility than drawing a bold shape immediately.
Your eyelid folds and natural differences between eyes influence where the liner needs to sit. Plan the visible effect with your eyes open, keep the upper line thin at first, and make targeted corrections when something looks uneven. A short flick can provide attractive definition without requiring the precision or adjustment of a larger, more dramatic wing.
With regular practice, you will learn which angle, applicator, and amount of product suit your preferences. Build confidence with one manageable style before experimenting with longer or thicker shapes for different occasions. The most useful technique is one you can repeat comfortably, giving you a polished result without turning every application into a complicated project.
FAQs
What Is the Easiest Way to Do Winged Eyeliner?
Draw a short outer guide, connect its tip to the upper lash line, and fill the small outline. Work in stages with your eyes open, keeping the first wing short enough to adjust easily.
Is Pencil or Liquid Eyeliner Better for Beginners?
Pencil is useful for softer results and easy adjustments, while liquid provides a sharper edge. Choose the product you control comfortably, and practice its pressure and flow before attempting a long or thick wing.
How Do I Make Both Wings Look Balanced?
Place small guides on both eyes before filling either wing, then compare them while facing forward. Adjust according to the visible result rather than forcing identical outlines onto eyelids that may naturally differ.
Can I Do Winged Eyeliner on Hooded Eyes?
Yes, plan the outer shape with your eyes open and keep the upper line thin. Adjust the connection around your fold, or choose a short flick if a larger wing becomes hidden or interrupted.
Why Does My Winged Eyeliner Smudge?
Smudging can result from surface oil, moisture, skin folds, touching, or a formula that does not suit your lids. Use light layers, allow setting time, and check whether mascara is causing the marks instead.